
Turkuaz VPN is our product that is automatically configured without the need for static IP on the branch side thanks to its Zero Touch feature. As soon as you introduce your device to the central firewall, the devices in the branches automatically receive all the necessary configuration information from Poniva cloud servers.
Installation Steps:
1- Main menu -> VPN -> Turkuaz -> Turkuaz -> Turkuaz Server settings.
2- Type: Layer2 and the start IP and end IP will be reserved for your devices on the VPN side. You should make sure that these IPs are not used in the center.
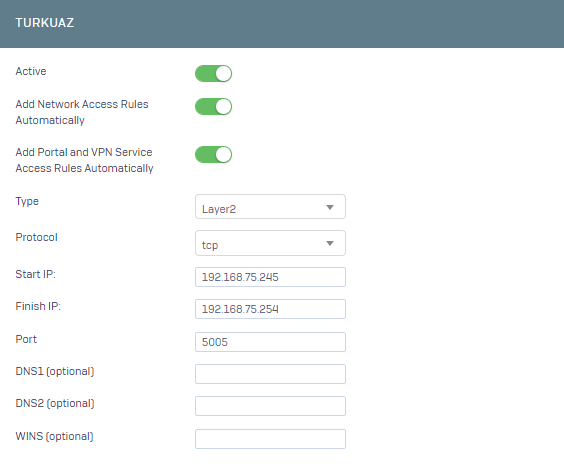
3- After activating the service, you need to introduce your Turkuaz VPN device to the firewall.
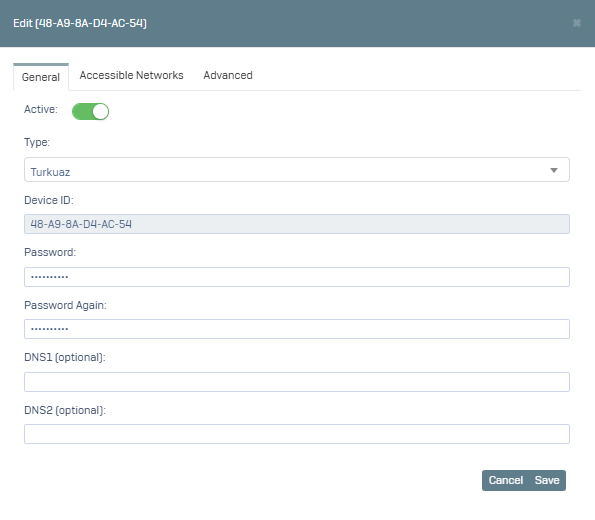
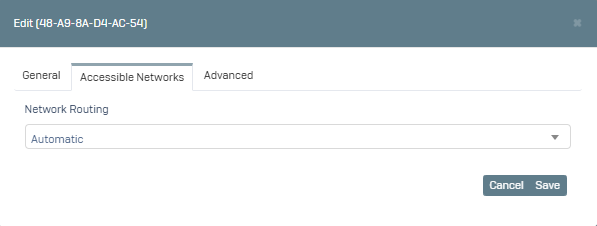
4- You can route all traffic on the device or only access to the IPs you want to the VPN tunnel.
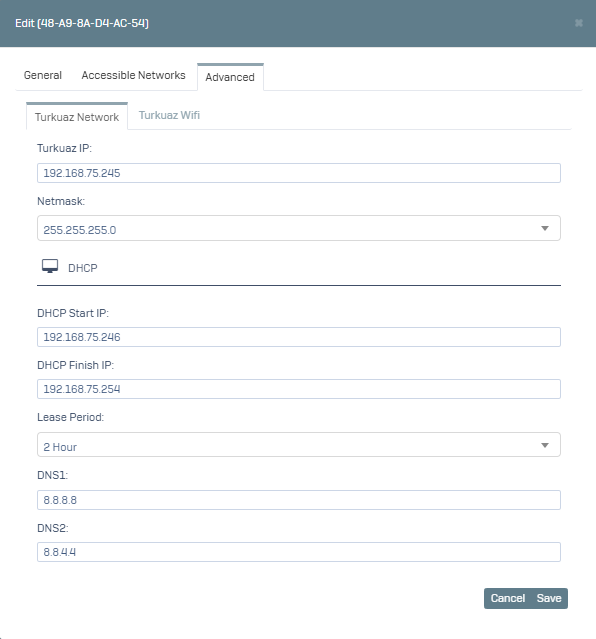
5- In the Advanced section you can enter DHCP and DNS information on the device.
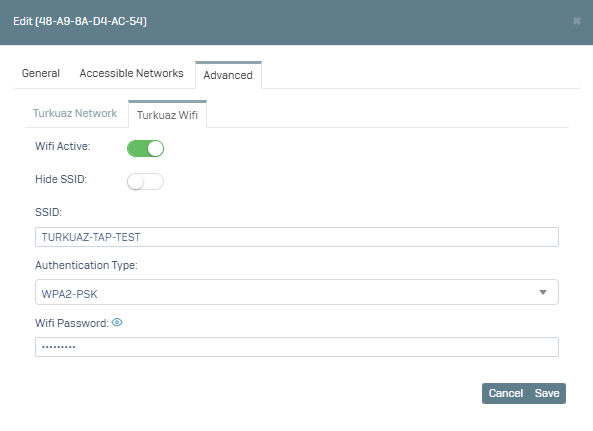
6- If you want to turn on Wi-Fi access on the device, you can make the relevant settings from the Turkuaz WiFi menu.
Turkuaz VPN Highlights:
❖ Centralized Management and Monitoring: Easy Management: Manage and monitor all your VPN devices from a single point with the firewall in the center. Monitor network traffic, connection status and security events instantly.
❖ High Performance and Reliability: Uninterrupted Connection: Turkuaz VPN offers high performance connection and optimizes your network traffic. In this way, your business processes continue uninterruptedly and reliably.
❖ Ability to Use the Same IP Block: Same IP Block for Headquarters and Branches: Simplifies and accelerates network management by using the same IP block for your head office and all your branches. This feature provides a great advantage especially in disaster recovery situations. You can quickly revert to the previous state without changing the network configuration.