
One-to-One: A type of NAT that maps a single external (real) IP address to a single internal (local) IP address. In this type of configuration, traffic from outside is routed to and associated with a specific local IP address.
For example;
A business / organization wants to access multiple services via metro ethernet and
Web Server: 192.168.1.90
FTP Server: 192.168.1.91
Mail Server: 192.168.1.92
Suppose that it receives multiple external IP addresses for these services. The business/institution has the following static IP addresses that come with the Metro Ethernet connection.
for Web Server: 215.45.69.20
for FTP Server: 215.45.69.21
for Mail Server: 215.45.69.22
Let's configure this example with Poniva.
On the interface screen, click on the Network->Virtual IP menu.
Click on Add.
1- On the screen that opens, we make our configuration for the Web Server. Here we fill in the fields Description, Type (we select one-to-one), Real IP (215.45.69.20), Local IP Address (the IP address to be routed inside, i.e. 192.168.1.90 is written), Interface (the relevant interface is selected).
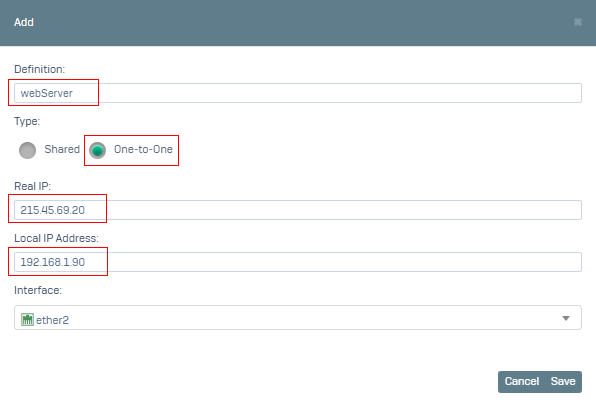
After saying Save, we do the same for FTP and Mail Server.
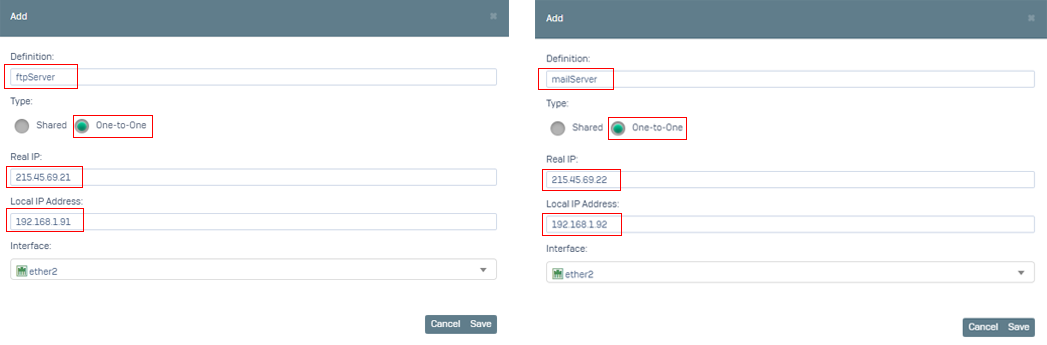
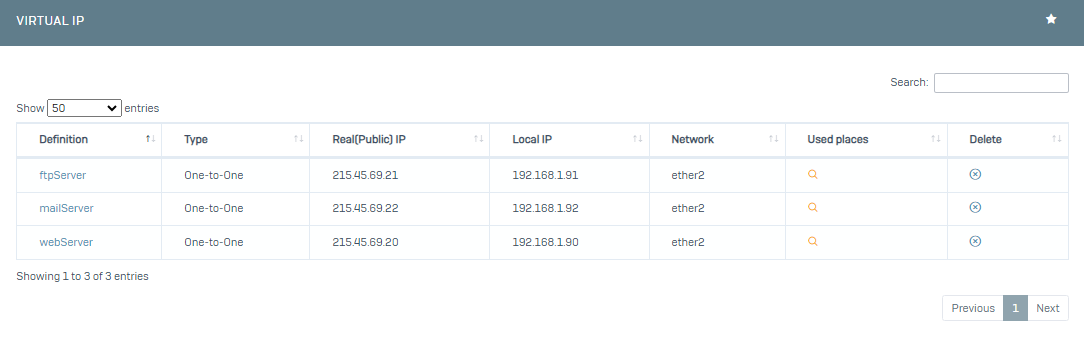
This configuration allows each server and service to be accessed via its own private IP address.
-----------------------------------------------------------------------------------------------------------------------------
Shared: Used to connect multiple local IP addresses to the internet via a single external (real) IP address. In this configuration, many devices share the same external IP address.
For example;
A business will provide access to the resources of a certain government agency. But it wants some users within the business to access it from a specific IP address. Suppose it has two different external IP addresses using a Metro Ethernet connection.
1.IP ADDRESS: 215.45.69.20
2.IP ADDRESS: 215.45.69.21
Public Users: 192.168.1.10 - 192.168.1.50 (access via IP Address 1)
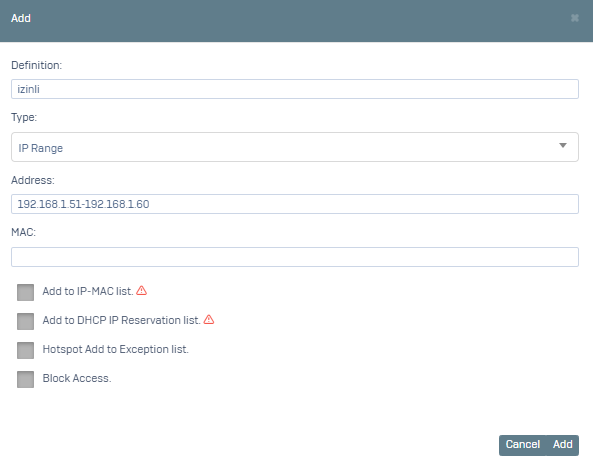
Private Users: 192.168.1.51 - 192.168.1.60 (access via IP Address 2)
Bu örneği Poniva ile yapılandıralım.
On the interface screen, click on the Network->Virtual IP menu.
Click on the Add option.
1- On the screen that opens, fill in the fields Description, Type (we select shared), Real IP (215.45.69.21), Interface (select the relevant interface).
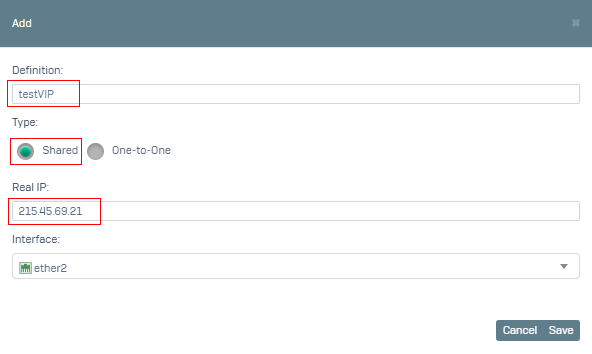
After clicking Save, go to the Settings->Group Management menu.
Click on Add.
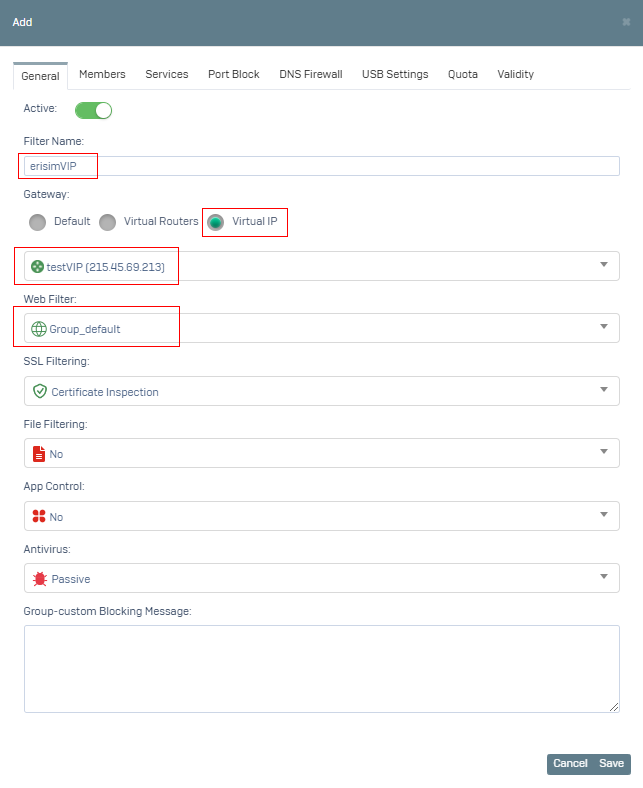
1- We specify the Filter Name on the screen that opens. For the Gateway, we select the Virtual IP option and the testVIP definition we just created. We select Group_default as Web Filtering (you can choose a different profile). You can configure other options according to yourself.
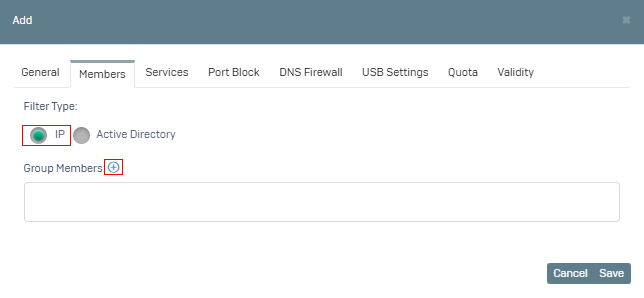
2- Switch to the Members tab, here we select the Filtering type IP. You can select your IP addresses defined in the Group Members field. If the address definition you want to add is not in the list, we add it by clicking the + button.
3- On the screen that opens, you can define the IP addresses separately or specify them as IP Range. We add it as IP Range.
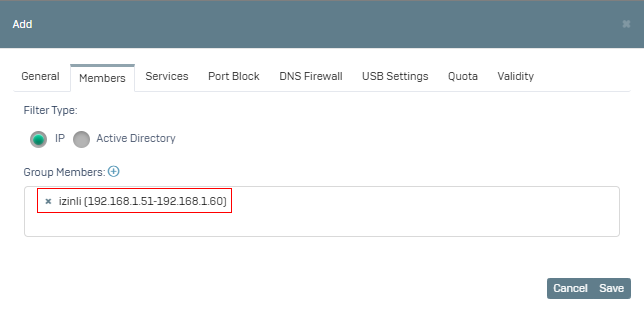
4- Select the definition we created in the Group Members field.
Save.
With this configuration, some of your users will access through the private IP address you specify.