
1. Plug a cable from the device's IGB0 Ethernet port to your DSL Modem/Router.
2. Plug a cable from the device's IGB1 port to your Switch or computer in your network.
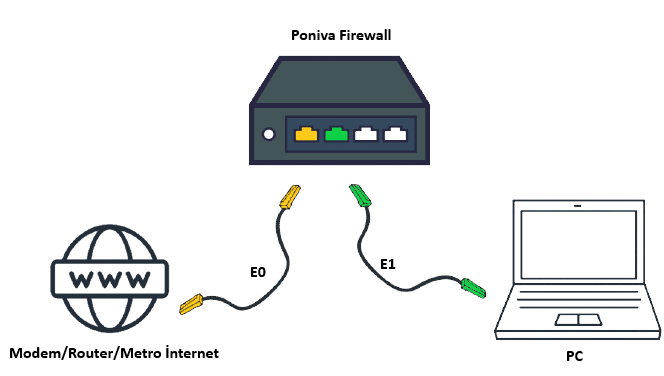
The default IP address of your device is 192.168.100.1.
You can access the Web Management Panel at https://192.168.100.1:8401 or http://192.168.100.1:8400.
Default User: admin Password: admin.
If you do not want to change your IP block in your network, you must change your modem's IP address to a different block before starting the installation.
For example; If your modem's IP address is 192.168.1.1, before activating your Firewall device, change the modem's IP address to 192.168.3.1 and turn it off and on so that your modem's settings are active.
Our connection process is complete, now we can make the initial setup settings.
For installation, our computer's IP address Firewall device must have an IP address in its network, for this we need to get a new automatic IP address for our computer or manually define an IP as follows.
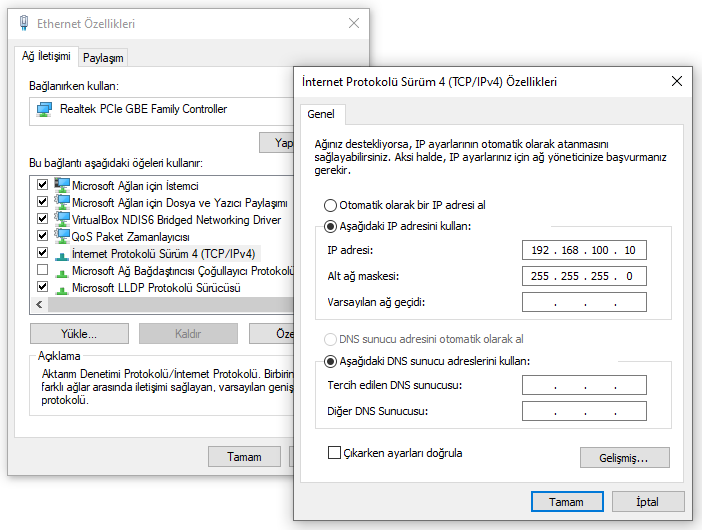
After the IP identification process is finished, we open our browser and write https://192.168.100.1:8401 or http://192.168.100.1:8400. (To access over http with Internet Explorer, you need to type "http://".)
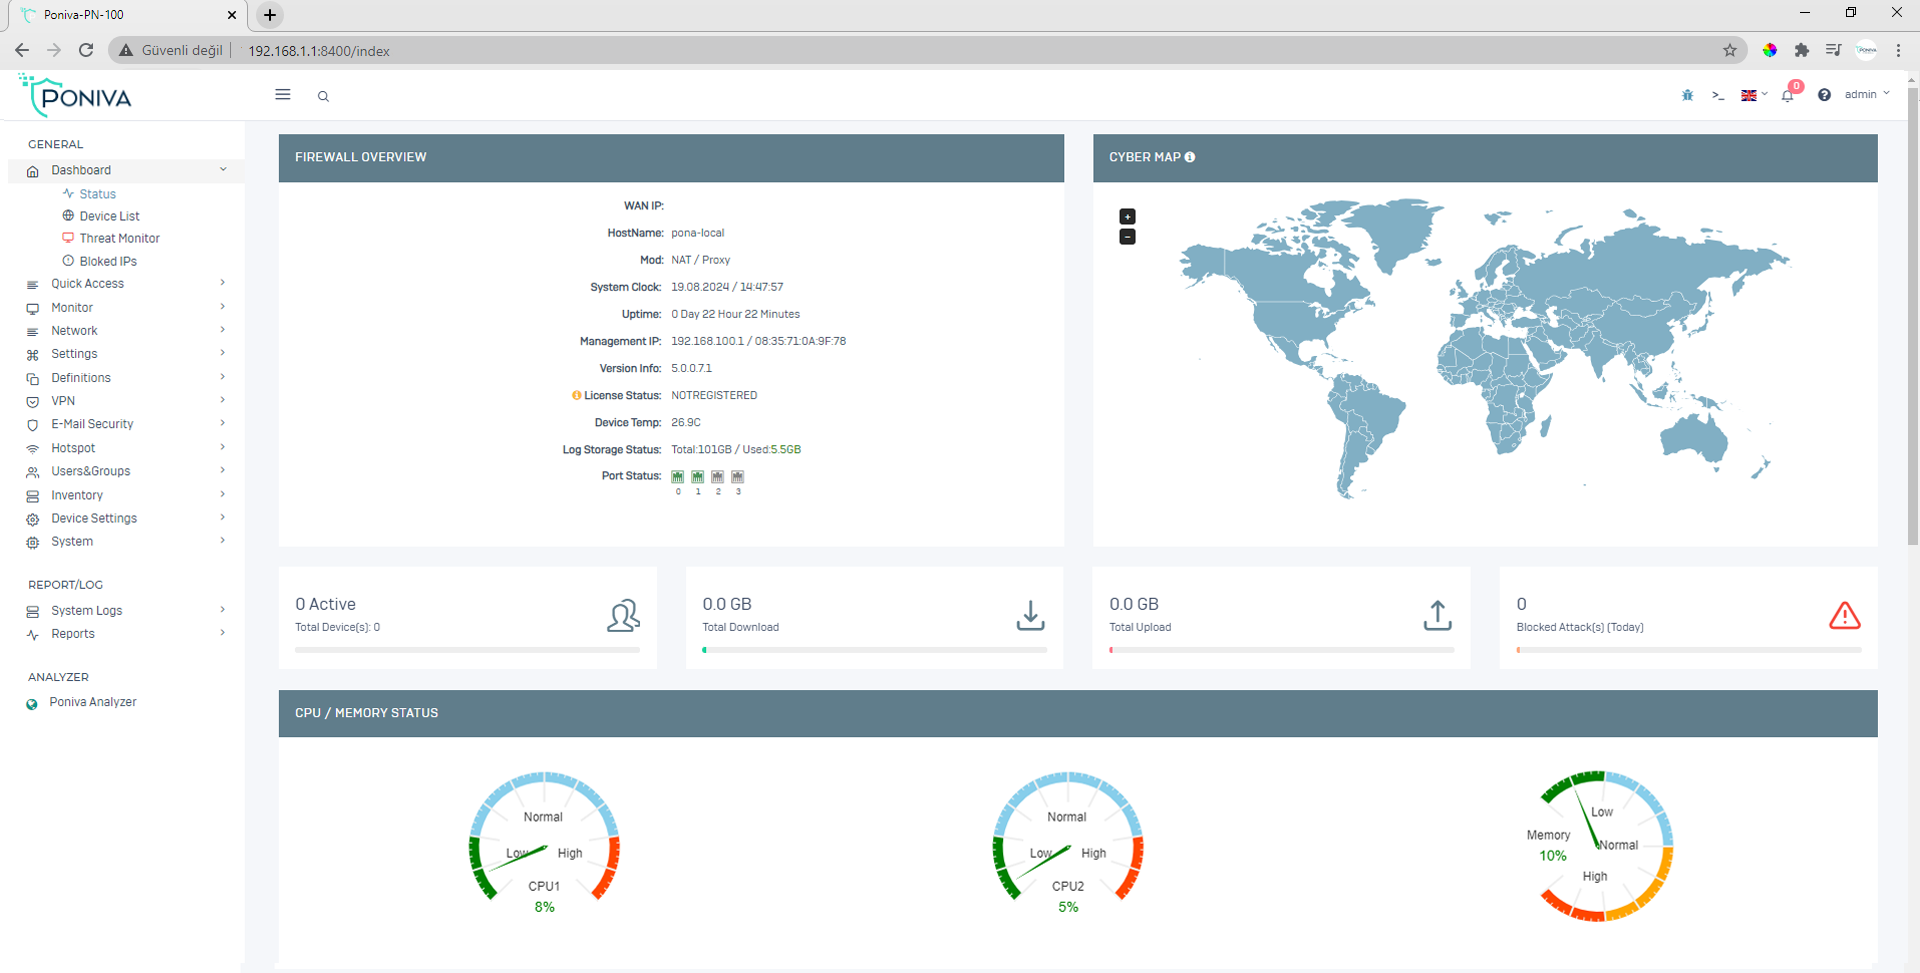
After logging into the Firewall interface, you can continue the installation with the help of "Wizard" or "Manual".