
Let's assume that the Fortigate IPSEC VPN configuration is as follows.
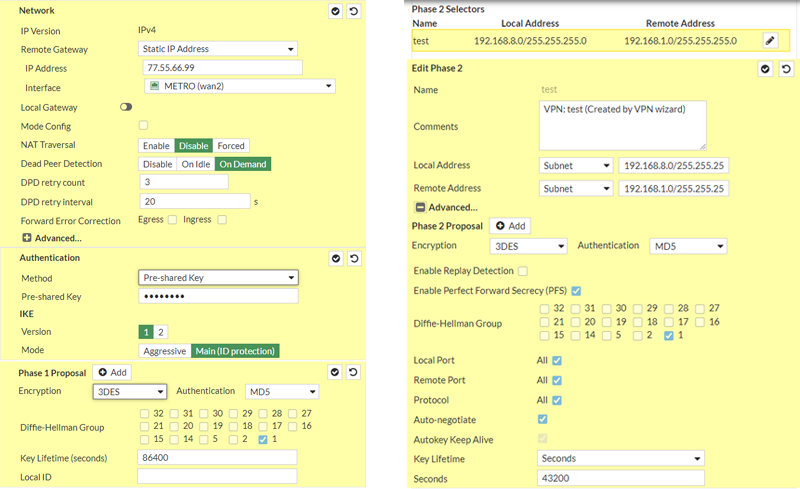
Here;
Local Network 192.168.1.0/24 and public IP address 77.55.66.99 (Poniva side)
It is assumed that the remote center/branch public (external) IP address is 219.41.59.66 and the Remote Local Network is 192.168.8.0/24 (Fortigate side)
Let's start configuring the Poniva side according to this image.
To add a new IPSEC VPN, click on the VPN->IPSEC menu on the Interface screen.
Let's start configuring the settings of our new vpn by clicking Add.
NOTE: IPSEC creates a secure connection between branches. Here it is assumed that the center and branch have static IPs. If you do not have a static IP, you cannot use this feature.
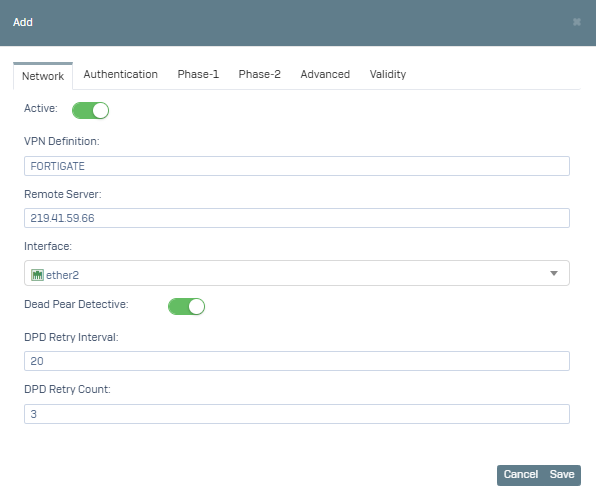
1- On the screen that opens, fill in the VPN Definition, Remote Server, Interface, Dead Pear Detective fields in the Network tab.
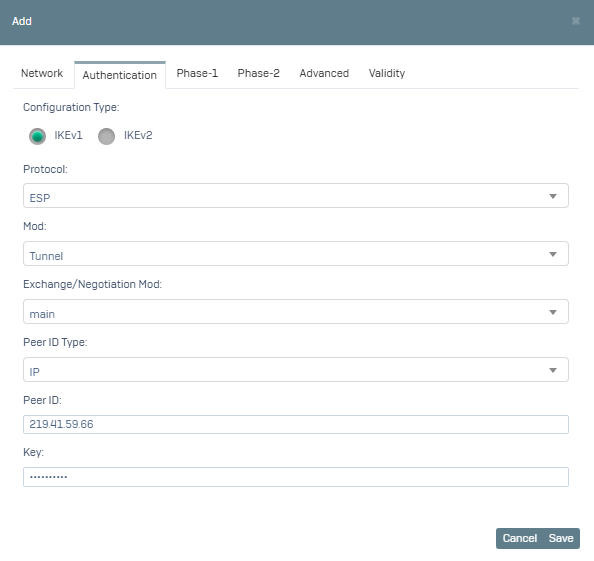
2- Switch to the Authentication tab, where the default Configuration type is IKEv1. Select Protocol, Mode, Exchange Mode as shown in the image.
Select Peer ID type as IP and enter the Public IP (219.41.59.66) address of Fortigate side in the Peer ID field. Key field is mandatory. (Your configuration here must be the same as the other center/branch).
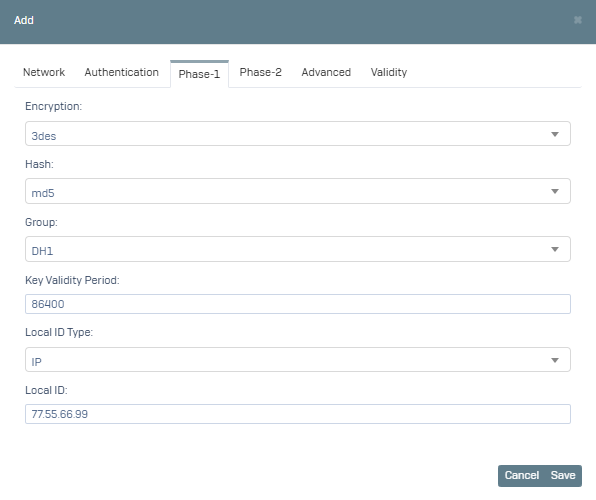
3- Switch to the Phase-1 tab, here we select Encryption, Hash, Group, Key Validity Period as shown in the image.
We select the Local ID type IP and write the Poniva Public IP address (77.55.66.99) in the Local ID field. (Your configuration here should be the same as the other center / branch).
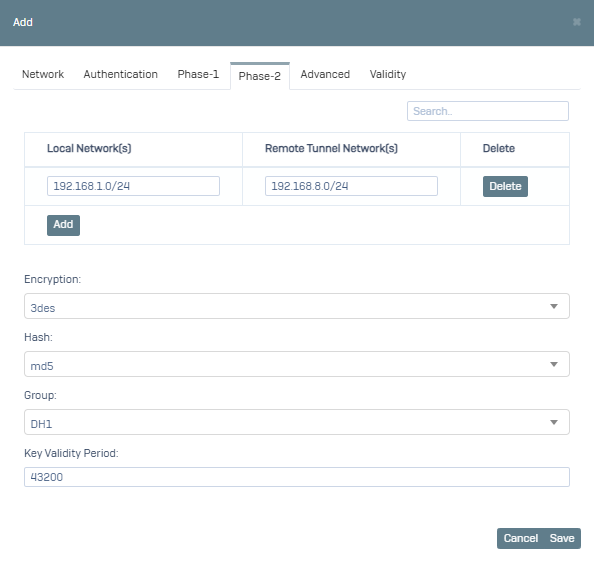
4- Switch to Phase-2 tab, where Local Networks is your own local network. RemoteTunnel Networks is the local network on the opposite center/branch side. If you want which of your local networks to access the remote local network, you need to add them as shown in the image. Encryption, Hash, Group, Key Validity Period are selected as shown in the image. (Your configuration here should be the same as the other center/branch).
After you click Save, you can test your connection.