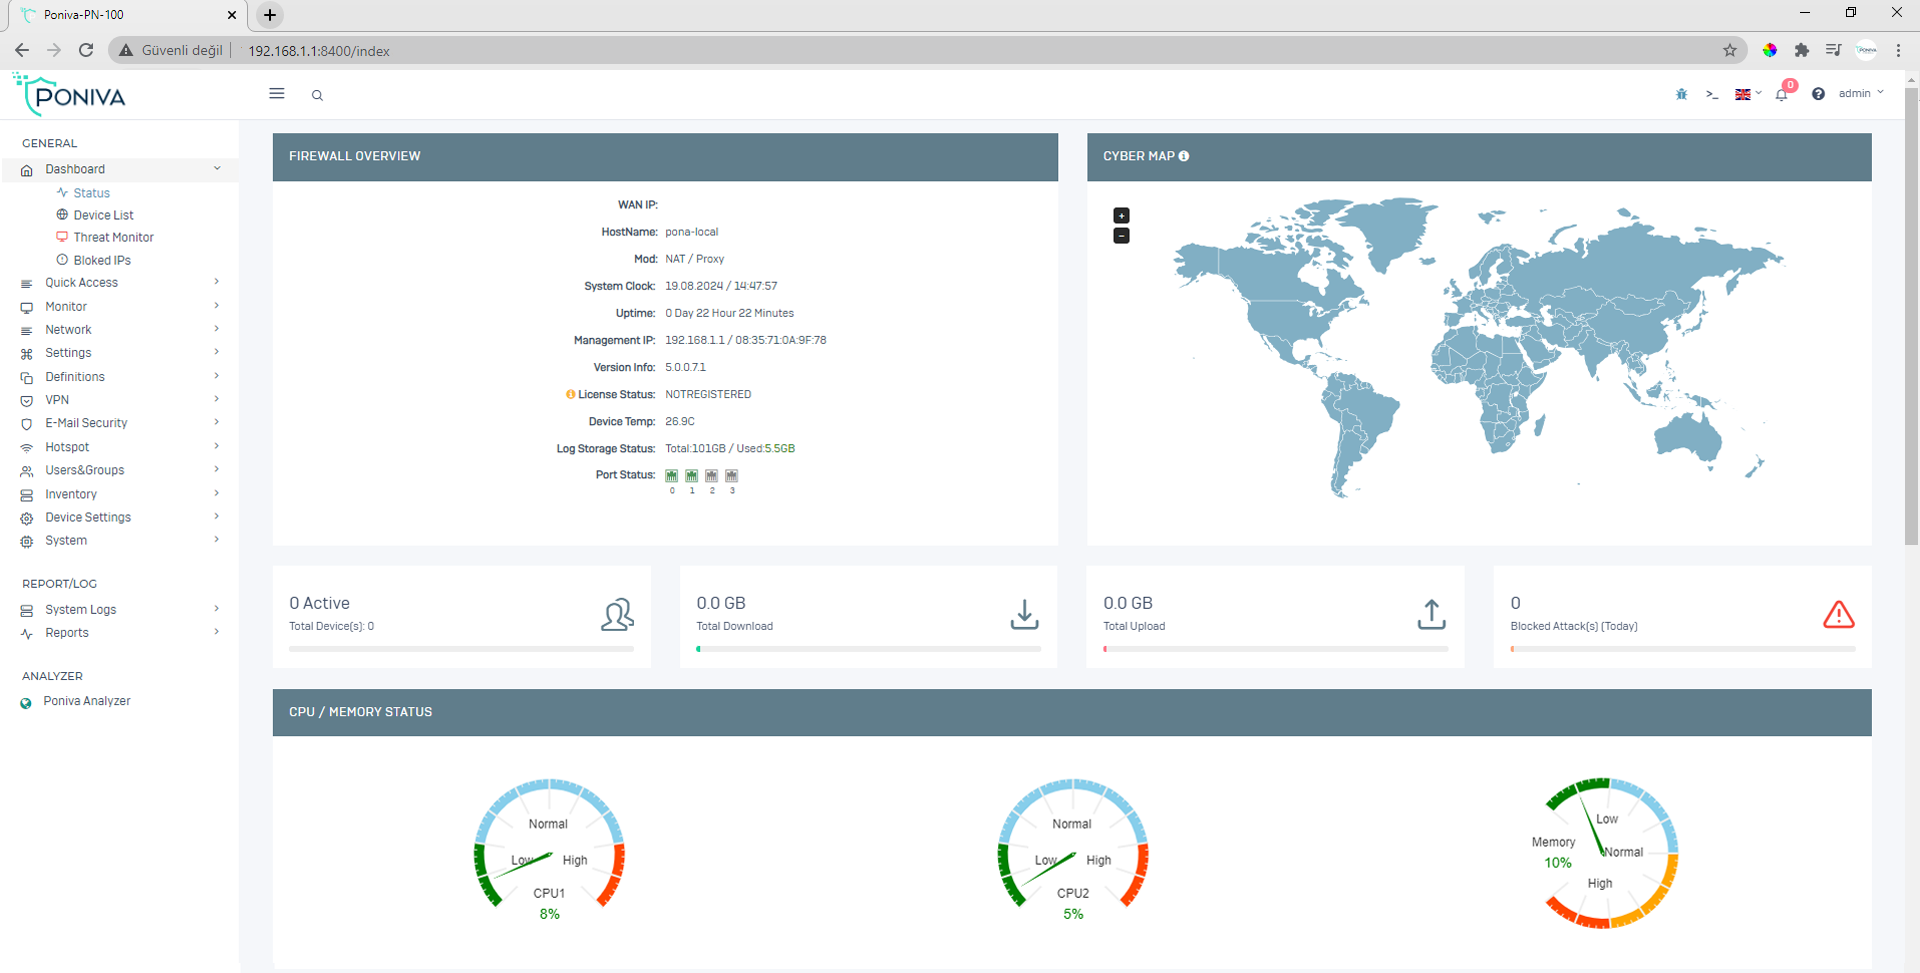
It will continue assuming your local network is 192.168.1.0/24.
Click on Network -> Interface menu.
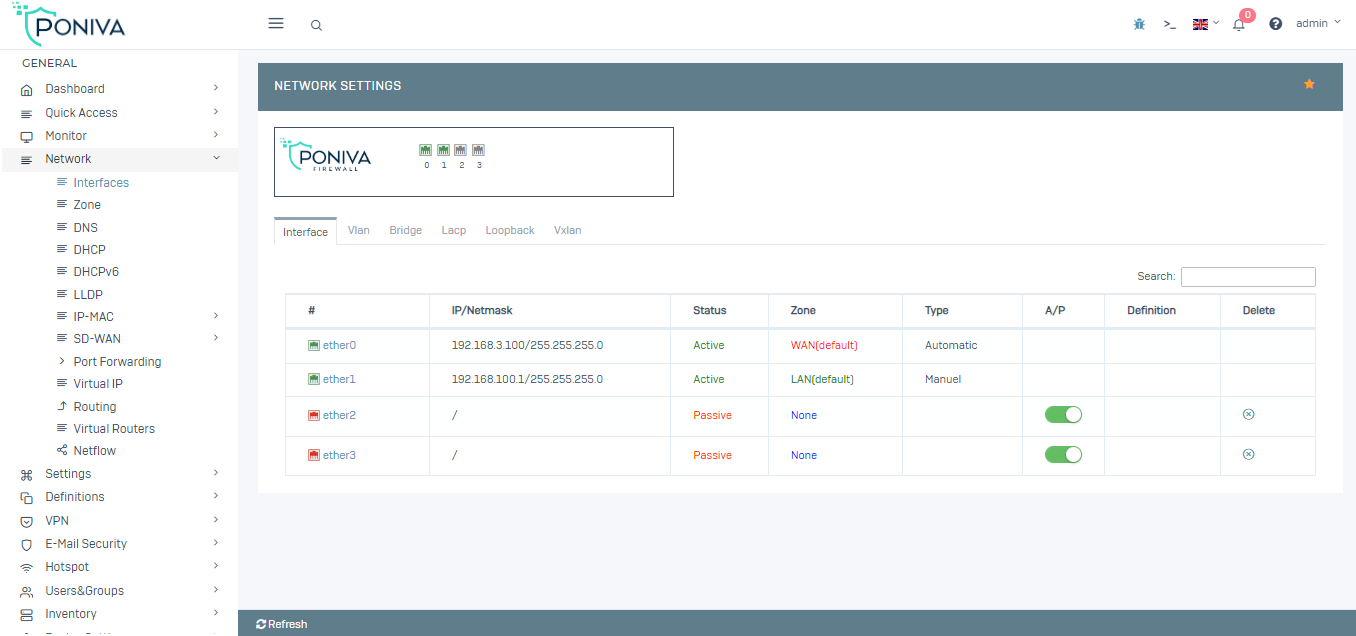
In the window that opens, we start configuring its settings by clicking on IGB0 (Default WAN interface).
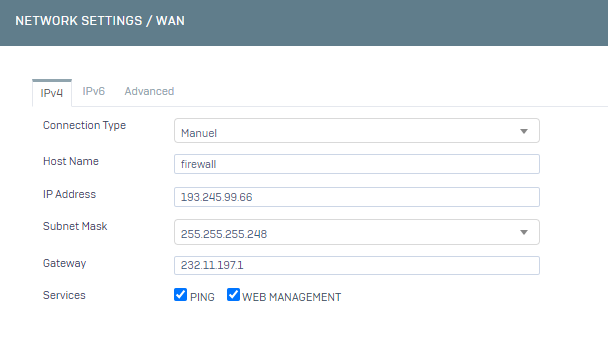
In the network section,
· We choose the connection type as Manual to define our IP address as metro ethernet,
· We enter the IP information given to you by your internet provider.
Our Network WAN settings are complete.
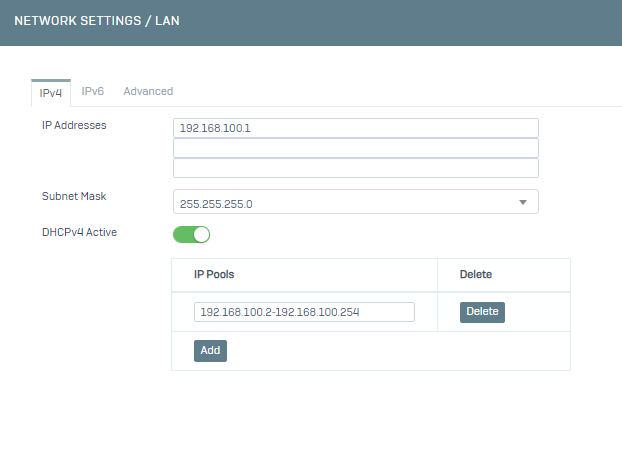
Now it's time to configure our local network, click on IGB1 (Default LAN interface) and start configuring its settings.
· Since our modem's old IP address is 192.168.1.1, we change the place where it says 192.168.100.1 to 192.168.1.1 (your local network),
· The subnet mask should remain as 255.255.255.0 if there is no special case,
You can activate the DHCP service, if another DHCP server will distribute your IP address or if you do not want to run this service, you can leave it passive,
· We exit this screen by clicking Save.
Our Network LAN settings are complete.
We start configuring DNS settings by clicking Network -> DNS menu.
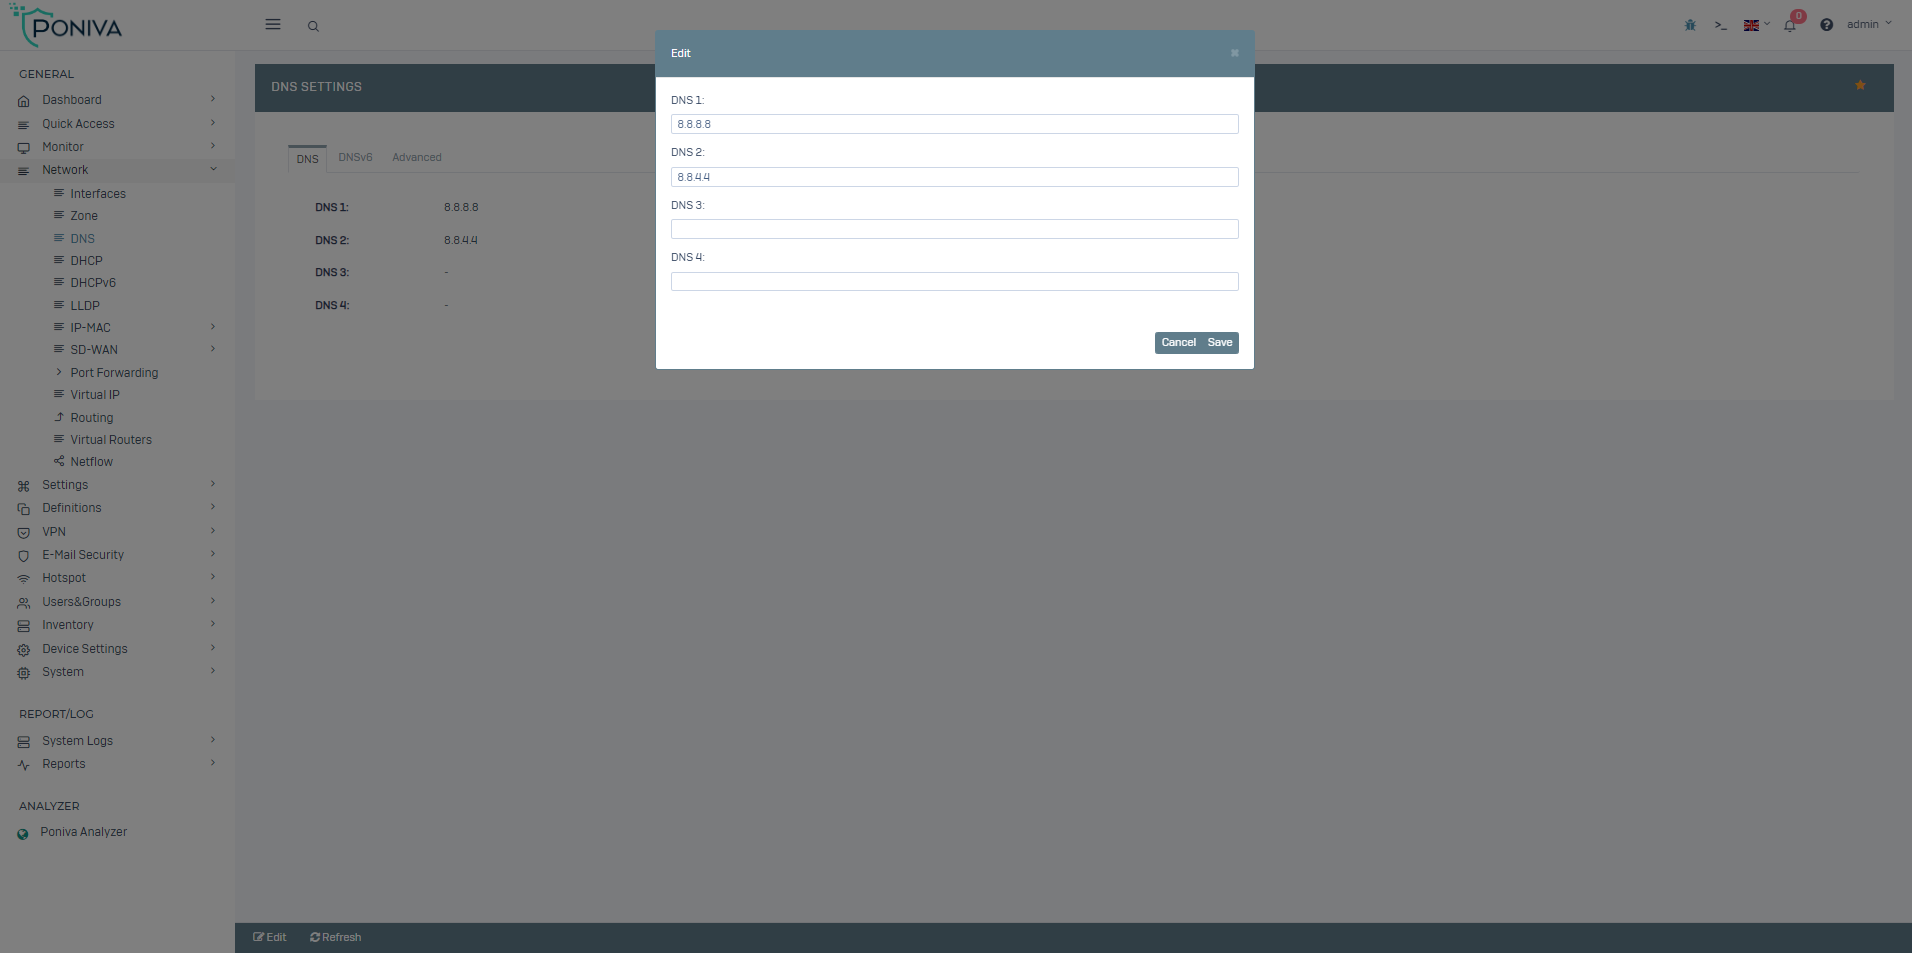
In the DNS servers section, you can write your internet provider's DNS addresses, Türk Telekom servers (195.175.39.39,195175.39.40) or a different DNS server. (For example; 8.8.8.8 / 8.8.4.4)
Our DNS settings are complete.
We start configuring the Routing settings by clicking the Network -> Routing menu.
· Here, the default value should be Metro Ethernet Gateway IP address.
Our forwarding settings are complete.
If there is no problem in our definitions, after restarting the device, the firewall's internet will be active.
Now we can access the interface by typing our new IP address (https://192.168.1.1:8401 or http://192.168.1.1:8400).