
After creating dynamic categories in Poniva Firewall, you can use them in your firewall rules.
For this, you can go to https://threatfeeds.io/ and get the url of the relevant blacklist category. We will use Cisco Talos Blacklist as an example.
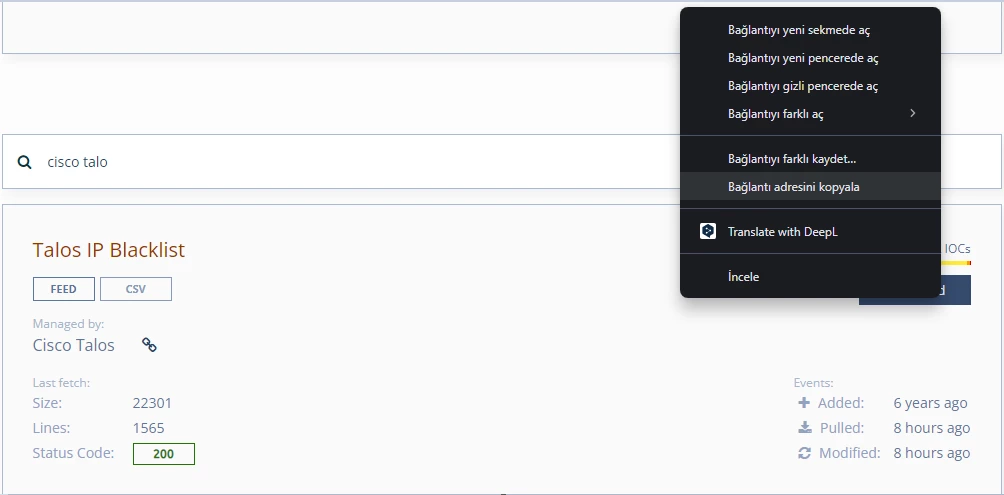
Then click on the Definitions->Dynamic Categories menu on the Interface screen.
Let's start the configuration by clicking on Add Category.
1- On the screen that opens, fill in the Category Name, Category URL (the link address we copied above), Update Interval (the firewall automatically updates the list as often as you specify here) fields.
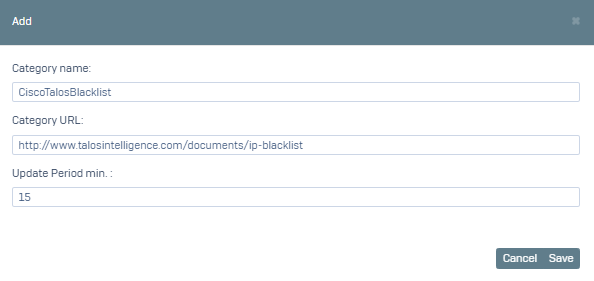
After saying Save, we add a firewall rule for this dynamic category. For this, click on the Settings->Firewall Rules menu.
Let's start configuring our rule by clicking on Add.
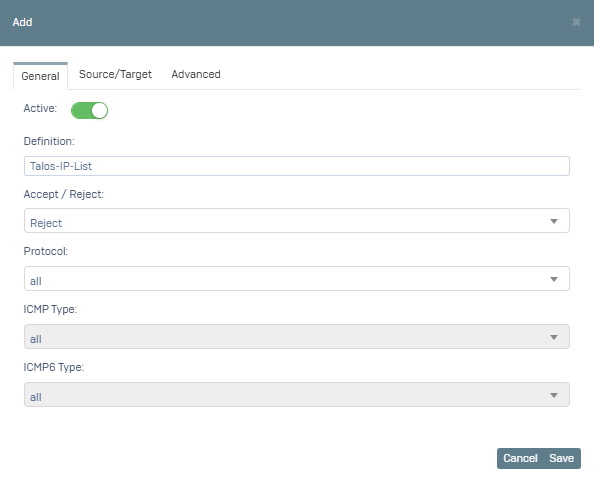
1- On the screen that opens, fill in the Description, Accept/Reject, Protocol fields on the General tab. Here we set our rule as Red because we will block access to our local from the dynamic category list we created for Cisco Talos Blacklist. We want to block all protocols by selecting Protocol all, but you can also block specific protocols.
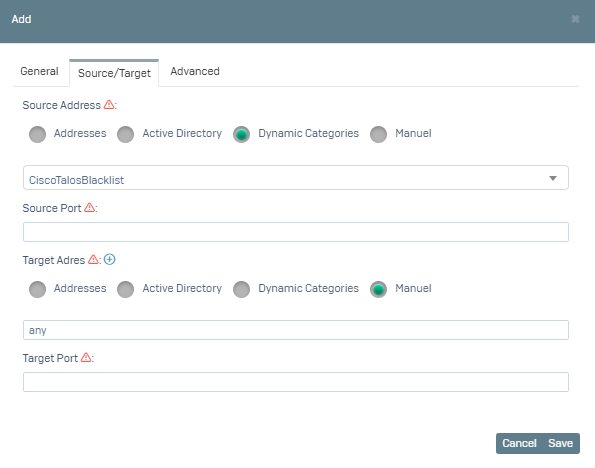
2- Switch to the Source/Target tab, where the Source Address field is the field where we specify from which address the request will be sent. We select Dynamic Categories as the Source Address type and select the category we created from the drop-down list below. The Target Address field is the field where we specify to which address the request is sent. We write our local network as the target address. We leave the Source/Target port fields blank.
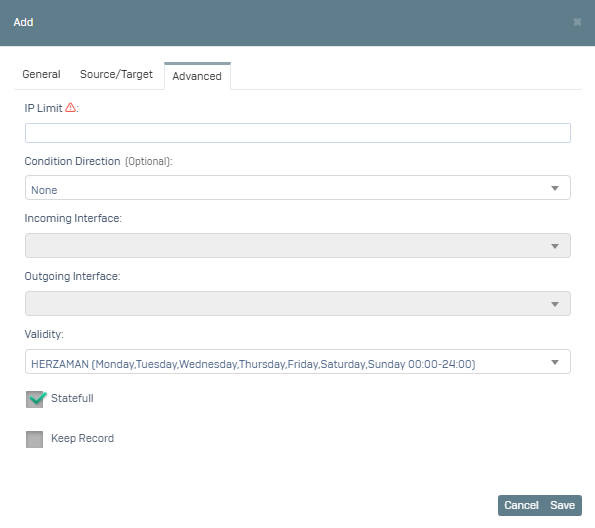
3- Switch to the Advanced tab, here you can specify the hours during which this rule will be active by selecting Validity. The default HERZAMAN option is active. We activate the Statefull option.
After you click Save, you need to move your rule to the top.