
The bridge definition is the same as the switch logic. You can make multiple ports exit over a single IP.
On the Firewall Interface screen, click on the Network->Interface menu. Go to the Bridge tab on the screen that opens.
Let's start configuring the bridge settings by clicking Add.
Here we will set our Bridge definition as LAN as an example.
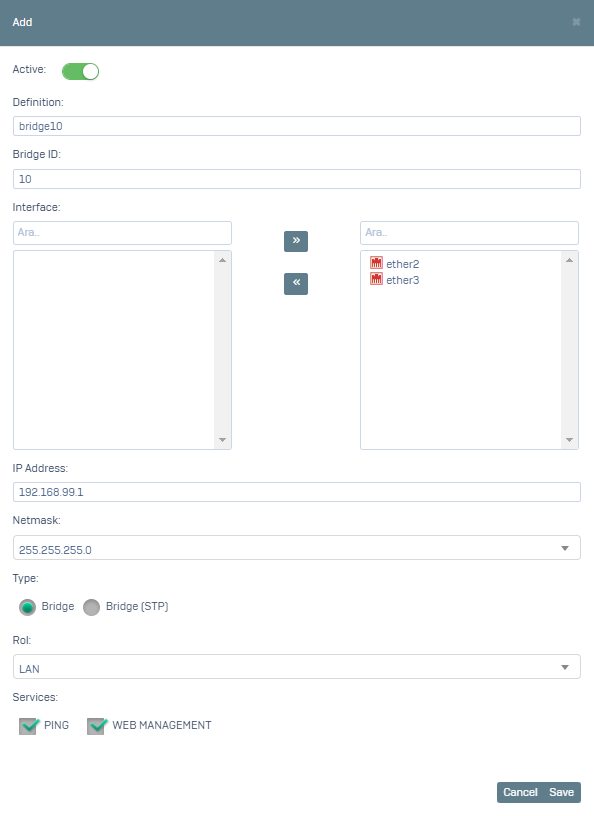
The service is activated on the screen that opens. Bridge ID, Interface (Your undefined ports are displayed and you need to select at least 2 different interfaces), IP Address (It must be an IP that you do not use in your local network structure), Netmask, Type (You can choose Bridge or STP), Role (When you select LAN, those ports you have selected will now work on the IP you have specified), Services fields are filled in.
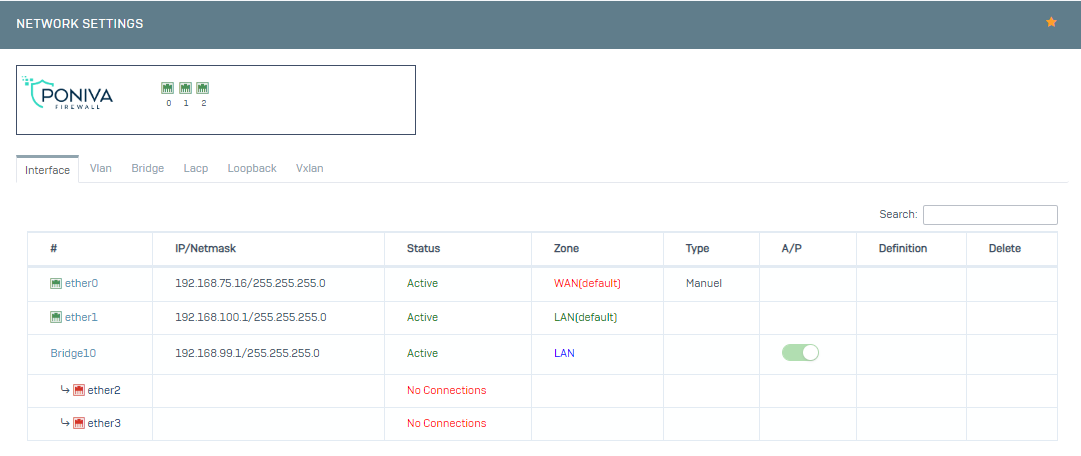
Save and our Bridge definition is displayed on the interface screen as follows. Here, ether2 and ether3 appearing red means that no cable is connected to the relevant port.
Now we need to configure the DHCP settings of the definition we created.
For this, click on the Network->DHCP menu on the Firewall Interface screen.
Click on the Add option.
The service is activated on the screen that opens. Interface (select the relevant bridge definition), go to the IP Pool tab and define the IP pool here. When adding a bridge definition, we set the IP/Netmask 192.168.99.1/255.255.255.255.0 and we need to configure the IP pool accordingly.
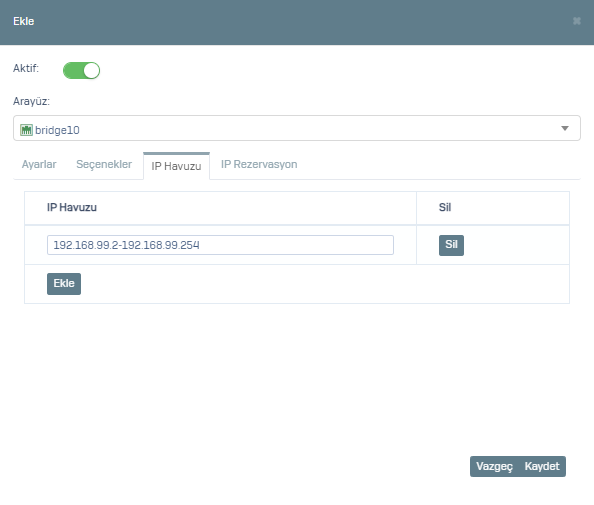
We have left the options in the other tabs as default, but you can configure them according to your preferences.
After you click Save, you can test it.